Friday, November 30, 2012

Amazon Web Services Re:Invent Report

amazon-web-services-re-invent-blog-domenech-org


Following my previous article for my trip to Re:Invent...

"T-Shirt" Project: Success!

Successfully delivered to Jeff Barr. Notice my face: I usually don't look so silly... I was nervous! :)

aws-reinvent-t-shirt-blog-domenech-org-jeff-barr
Jeff Barr, AWS

Carlos Conde was very difficult to locate at the event: He's and important man. But "the creator" deserves a t-shirt and a special version one.

aws-reinvent-t-shirt-blog-domenech-org-carlos-conde
Carlos Conde, AWS

It took some courage to give my present to Adrian Cockcroft. He's like a star! :)

aws-reinvent-t-shirt-blog-domenech-org-adrian-cockcroft
Adrian Cockcroft, Netflix


Bring ideas and find out about future plans: Success!

aws-re-invent-t-shirt-blog-domenech-org-anil-hinduja
Anil Hinduja, CloudFront

aws-re-invent-t-shirt-blog-domenech-org-tom-rizzo
Tom Rizzo, EC2 AWS

aws-reinvent-blog-domenech-org-training-certification
AWS Training Team
I had a good chat with the Training Team and there are VERY interesting news about Certification. I'm pretty sure we will have and official announcement in the following weeks. We'll wait for that.


News:


Zadara Storage: A surprisingly and interesting approach to provide high-end storage for EC2 Instances. They've managed to have space at AWS Data Centers to install there SAN Disks Arrays and they're willing to connected them to your EC2 Instances using Direct Connect. This connection method is used to connect your office or your on premise infrastructure to your VPC but in this case they connect storage through iSCSI or NFS. The price of the service is per hours basis and you get full access to the admin tool to define your volumes and parameters like RAID configuration. With a solution like that, there is no limit for the kind of application to run on EC2. Even the more I/O demanding ones. We are talking here about non virtualized storage. The old fashioned SAN array. Currently is only available at US-East Region but with plans to expand to other regions.
Besides technical and commercial considerations, this product/service says a lot of how open is AWS when it comes to giving tools to their costumers. Is hard for me to imagine others companies letting in a competitor into their buildings. Well done!


New EC2 Instance Types: A "Cluster High Memory" instance with 240 GB RAM and two 120GB SSD disks. A "High Storage" instance 117 GB RAM and 24 hard drives (48 TB total). I only can say: Awesome! According with the EC2 Team, this internal storage will be managed as the any other kind of Instance Storage and therefore is: Ephemeral. Using their words: "It will be amazing to see how you (the costumers) create new ways to use this storage". I couldn't agree more.


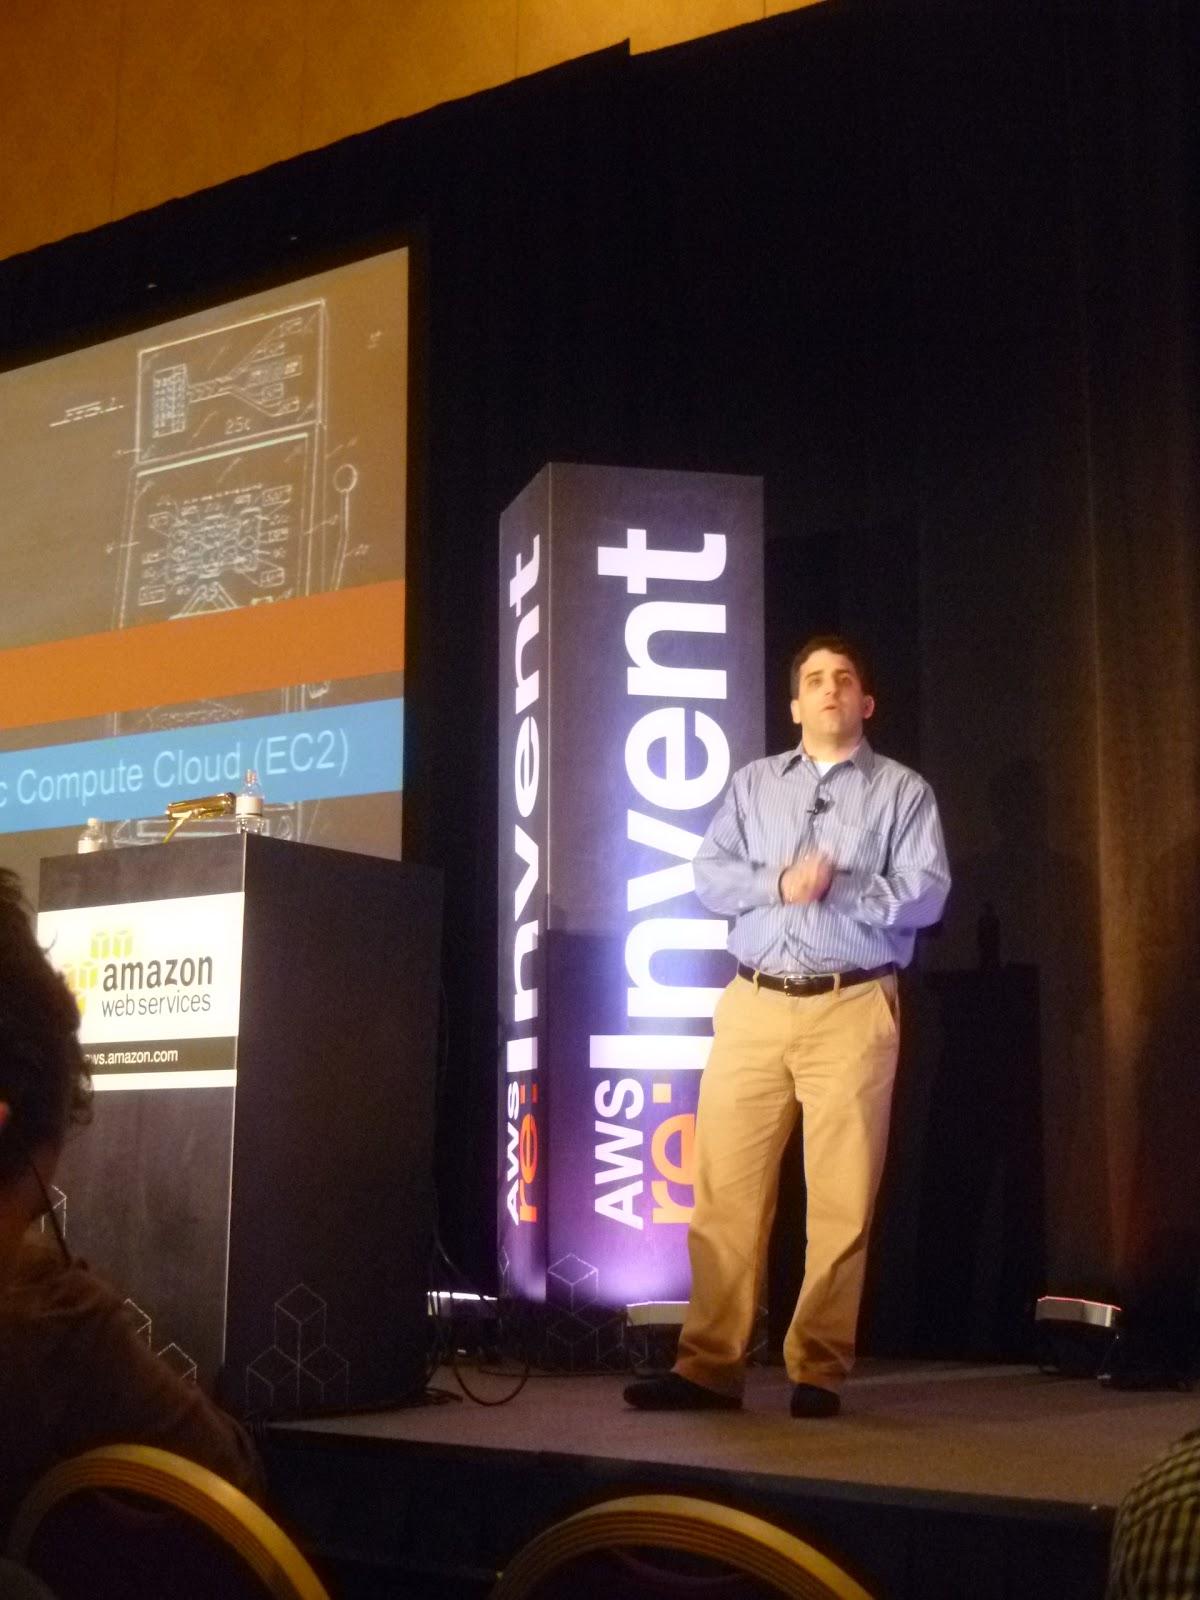
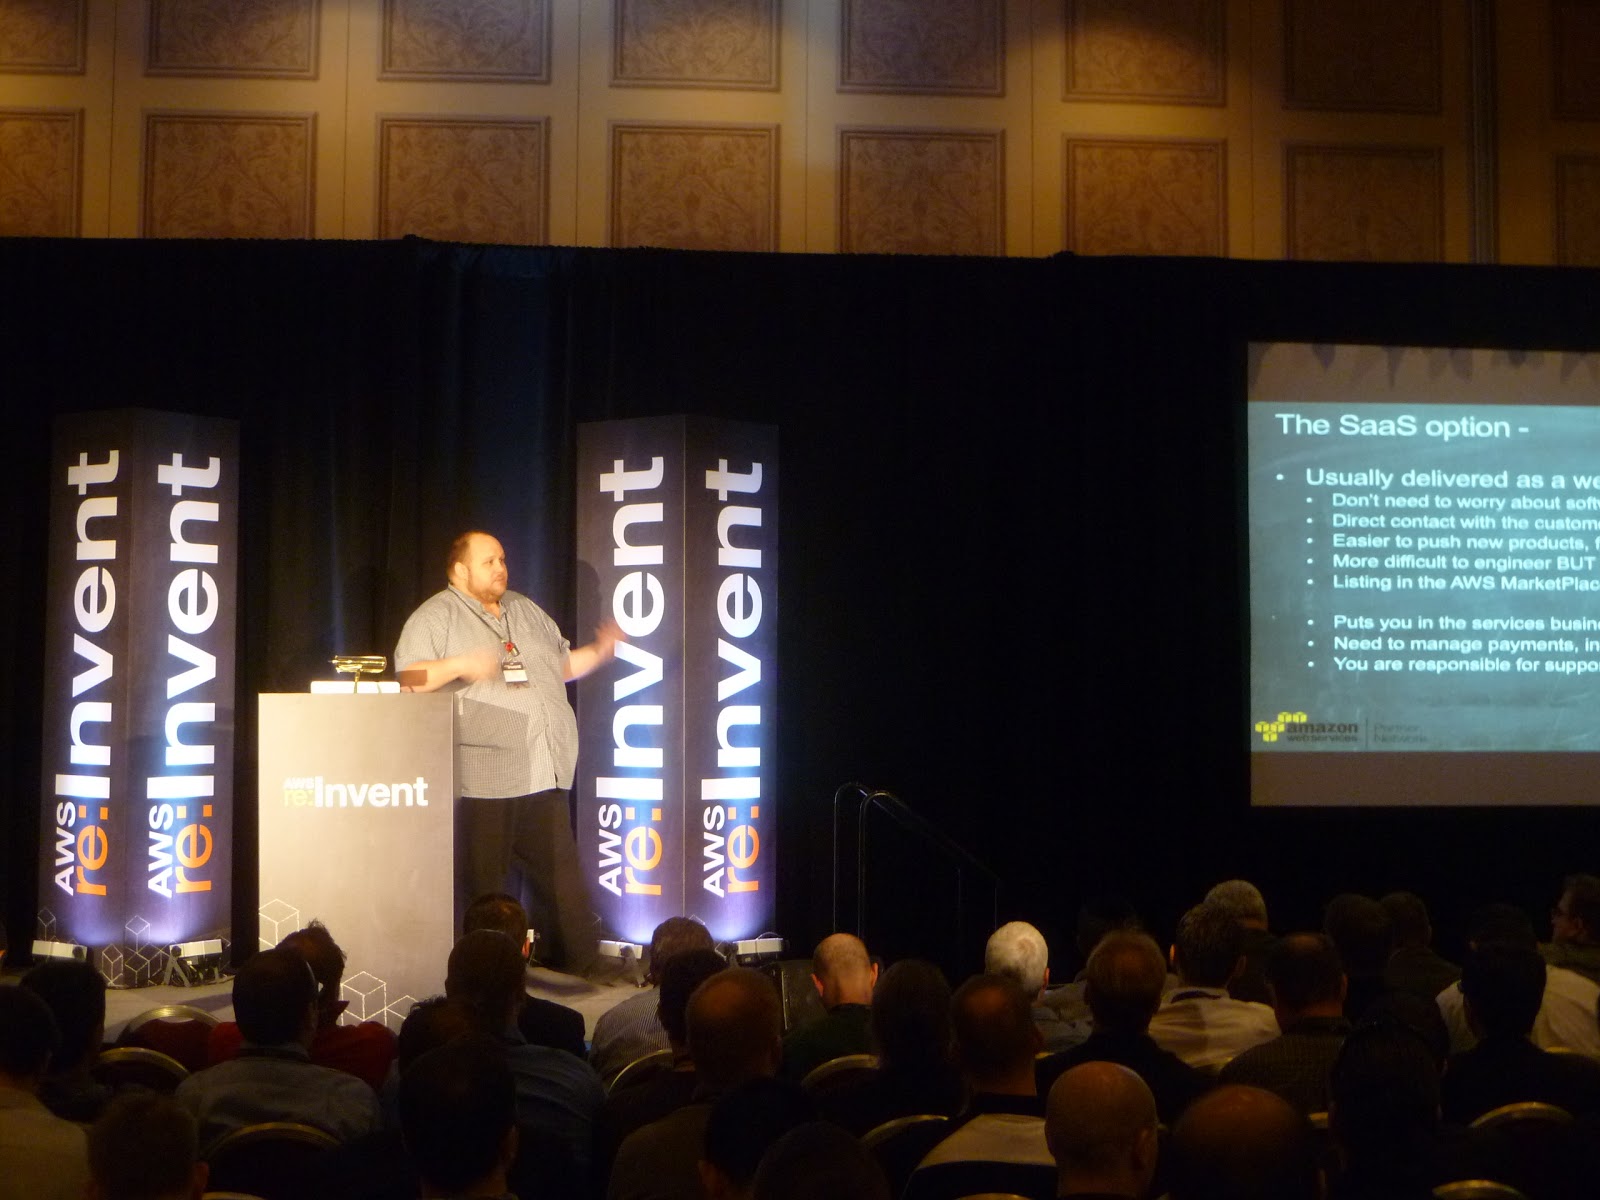
AWS Marketplace is not just a place to sell AMIs. Thanks to the talk of Craig Carl I've got a wider perspective of AWS Marketplace. We should see it like a tool to sell anything your are able to create in Amazon Web Services cloud. Not just an AMI with an application stack in, but a dynamic configuration set. A configuration that adapt to the consumer needs gathering information automatically of interacting with the user.
And a new concept of product just emerged: A Marketplace application could be something else than an application. I'll try to explain it with an example: You could create an application to access some information. The information is what the costumer wants (no the application itself). As long the application is running, the costumer is accessing to the information and therefore is billed (and you get your cut). When the contract expires, the application shuts down and the deal ceases. Commercial or infrastructure costs on your side (the provider) = zero. Awesome.
I my opinion, a new job role has been created: "Marketplace application stack developer".

An EC2 Spot Instance can be automatically terminated at any given minute. We knew that they can be terminated without previous warning when a "On Demand User" needs the resources you're using but we didn't know when it could happen.

"AMI" could be spelled as "A.M.I." or can be pronounced as /æˈmɪ/


And some more pictures:

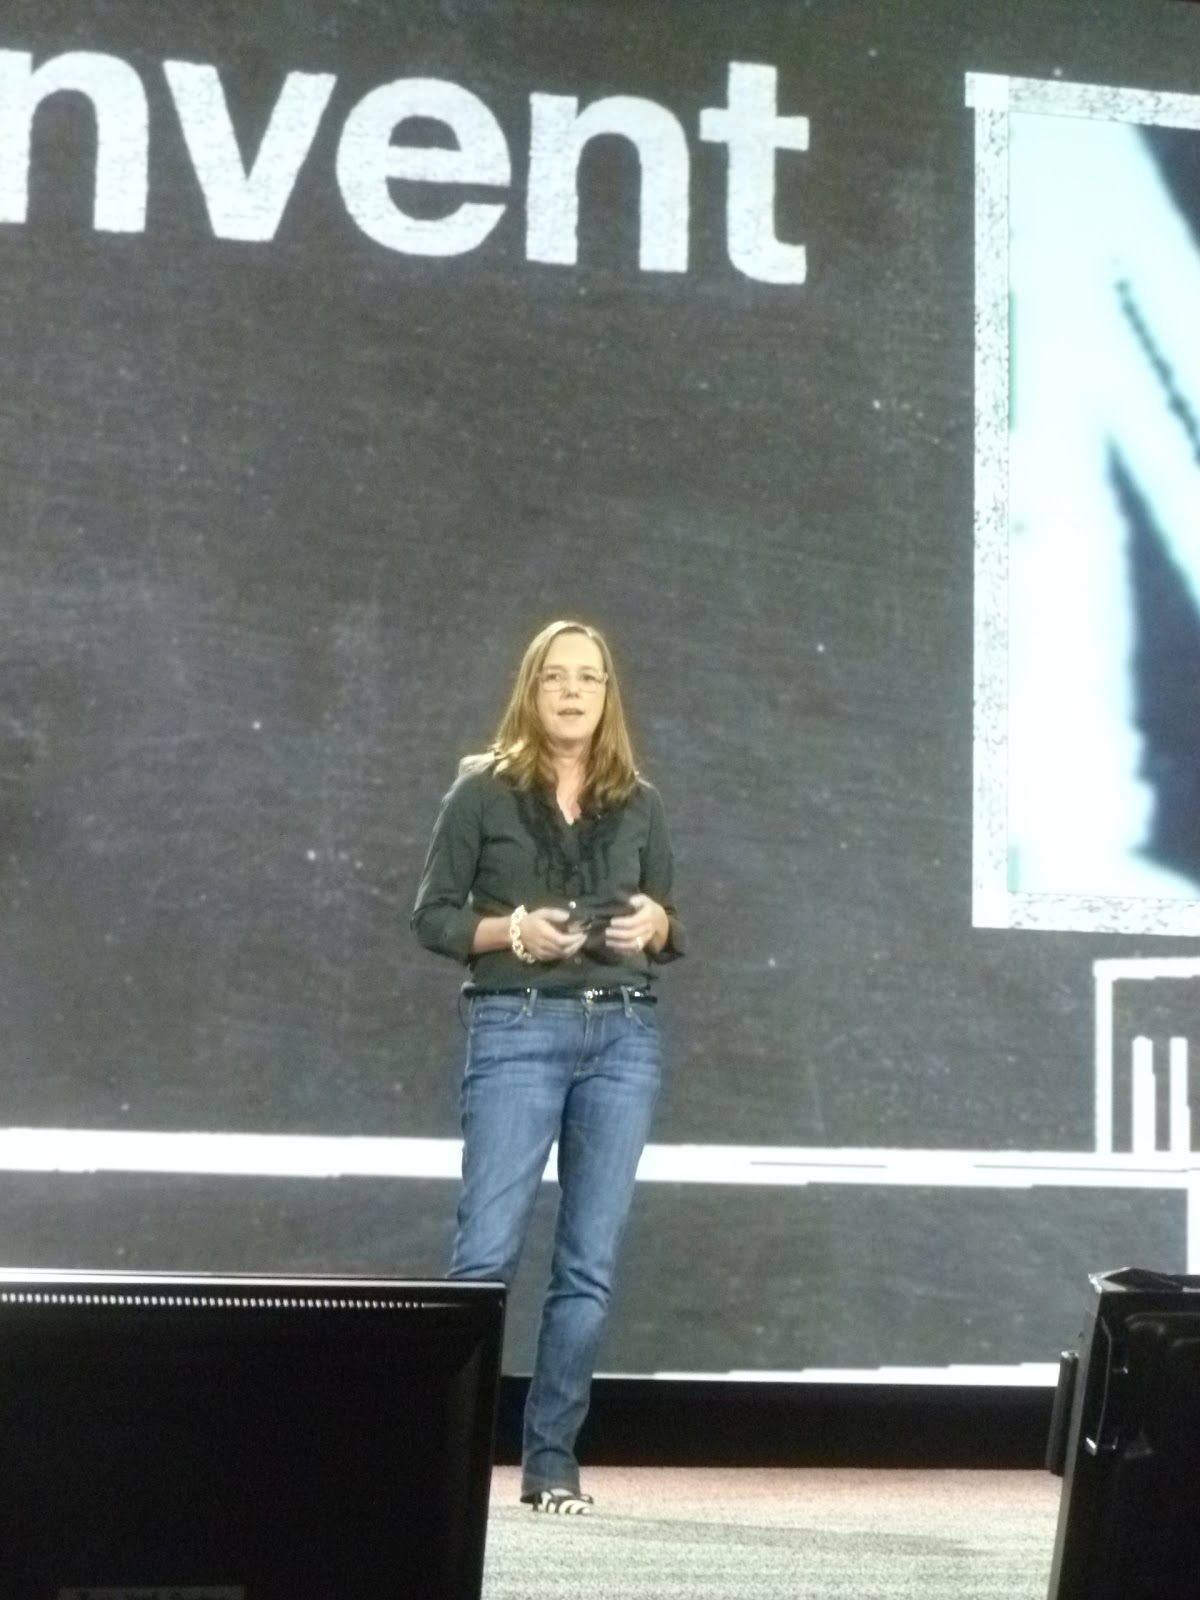
amazon-web-services-re-invent-blog-domenech-Simone-Brunozziamazon-web-services-re-invent-blog-domenech-org-jeff-bezosamazon-web-services-re-invent-blog-domenech-org-matt-wood


amazon-web-services-re-invent-blog-domenech-org-legoamazon-web-services-re-invent-blog-domenech-org-think-big-start-smallaws-amazon-web-services-reinvent-blog-domenech-org-only-you-can-protect-amazon-security


amazon-web-services-re-invent-blog-domenech-org-netfilx-adrian-cockcroftamazon-web-services-re-invent-blog-domenech-org-s3-simple-storage-serviceaws-amazon-fcb-futbol-club-barcelona


aws-amazon-web-services-reinvent-blog-domenech-org-badgesaws-amazon-web-services-reinvent-blog-domenech-org-nasa-jplaws-amazon-web-services-reinvent-blog-domenech-org-nasa-jpl-curiosity


aws-amazon-web-services-reinvent-blog-domenech-org-obama-diagramaws-amazon-web-services-reinvent-blog-domenech-org-jeff-barraws-amazon-web-services-reinvent-blog-domenech-org-max-spevack-linux-ami


aws-amazon-web-services-reinvent-blog-domenech-org-spot-instances-1aws-amazon-web-services-reinvent-blog-domenech-org-spot-instances-2aws-amazon-web-services-reinvent-blog-domenech-org-werner-vogels


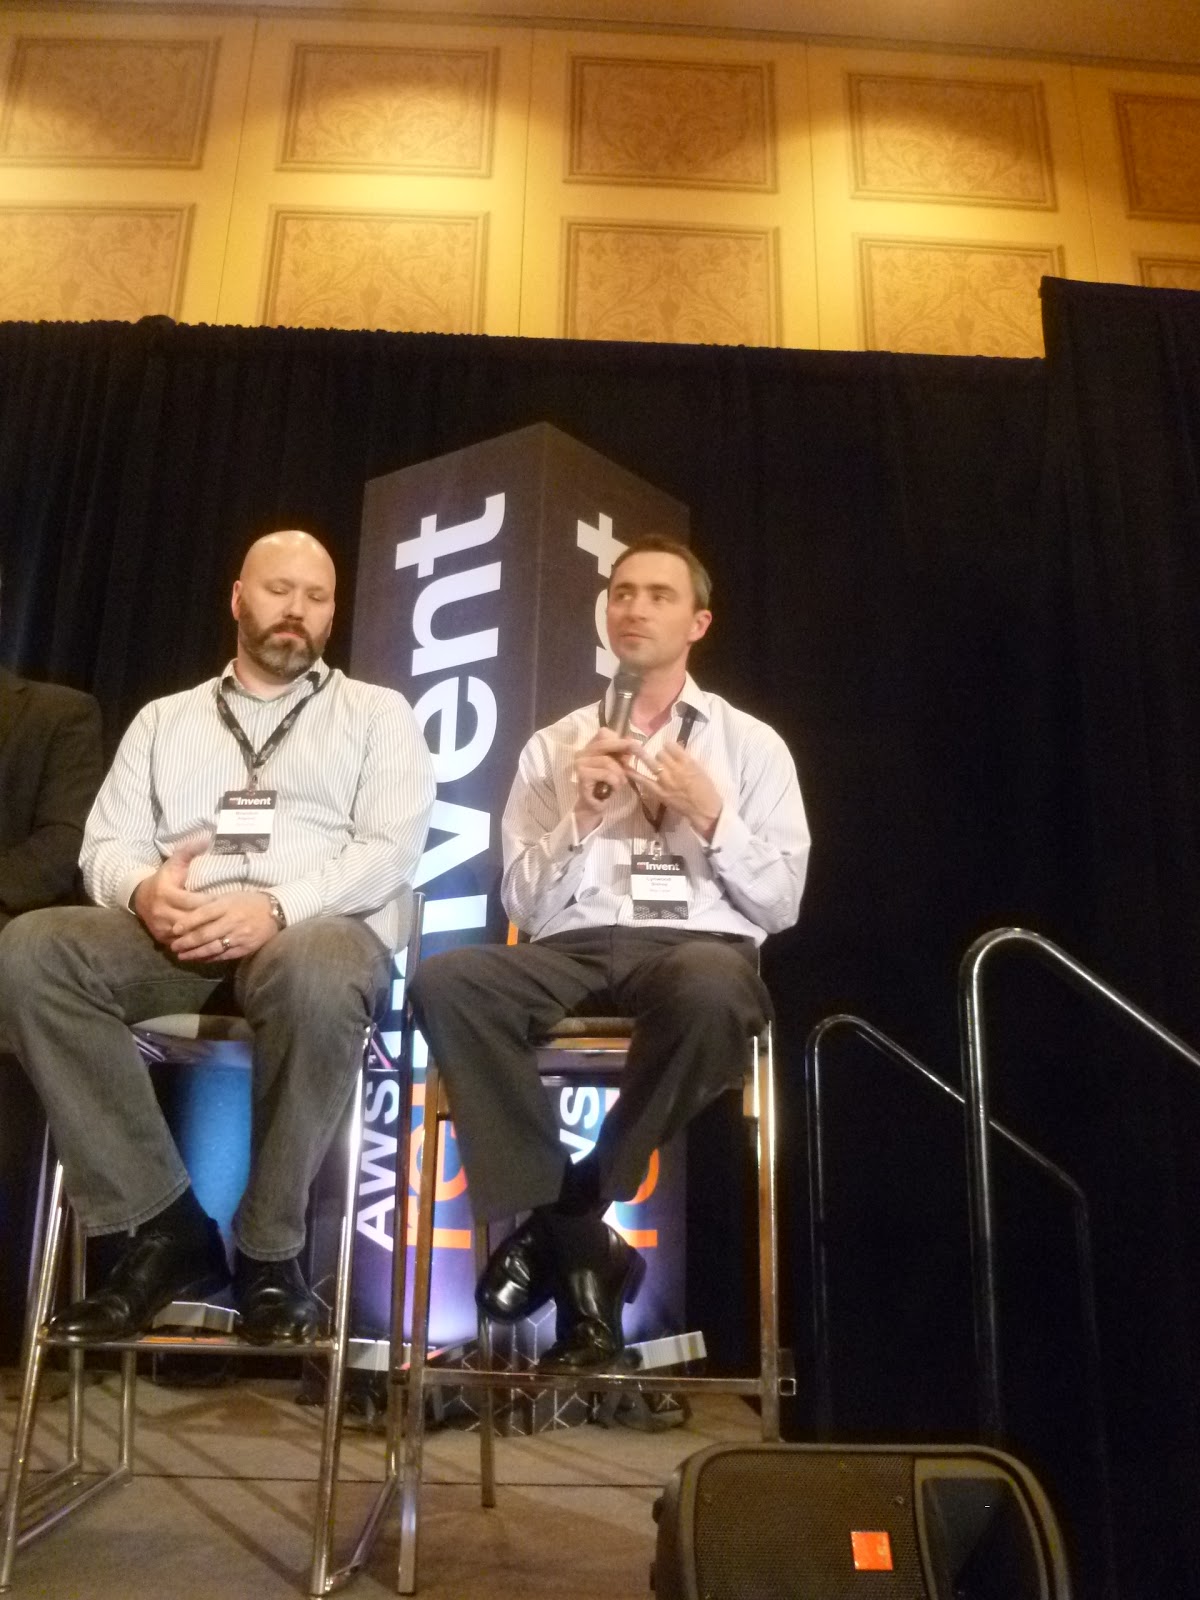
aws-reinvent-blog-domenech-org-craig-carlaws-amazon-web-services-reinvent-blog-domenech-org-tiffani-bova


Thursday, November 22, 2012

"Still Plays With Blocks" T-Shirt AWS Diagrams are here!

My T-Shirts for the event are here!

blog-domenech-org-still-plays-with-blocks-t-shirt-aws-diagram

And they look cool! :D


Saturday, November 17, 2012

What I would like to bring from Las Vegas AWS re:Invent 2012 ?

Amazon Web Services Re:Invent 2012 Las Vegas

My wish list:

- I would like a handshake with Jeff Barr, AWS Evangelist and leader of its official blog. I think he's doing and excellent job and I admire how he manage to find time to accomplish his tasks.

- I would like a handshake with Carlos Conde, AWS Europe Solutions Architect. I had the opportunity of helping him at the last Navigate the Cloud Barcelona/Madrid and there I have discovered that he is the designer of the awesome design used in all the AWS Official Architecture Diagrams. He is an excellent communicator and as it turns out, he is brilliant graphic designer. I have no words to express my admiration.

- I would like a handshake with Adrian Cockcroft, Cloud Architect at Netflix. I red him (without me been aware of) back when I was a Solaris enthusiast and I like his way of communicate: Sharp, sober and with a little touch of humor.

- I would like to have some beers with my friends of Celingest.com. They are going to be there and I have a present for them (and for the people mentioned above). What it is? You will see ;)

- I would like to know if there is an AWS Architect Certification on the road map and if so, details about it. Now you have an official architecting training course but I hope there is more coming about this topic.

- I would like to know the plans to implement native Hot-Link protection for CloudFront. This was an issue some time ago for S3 but now is solved with referral control. Some of my customers would like that to happen for CloudFront as well.

- I would like to know if there is any plan to adopt BGP routing for Disaster and Recovery solutions. AWS is doing an effort to become the perfect choice when it comes to D&R and I think it is. The option of having a "sleeping infrastructure" waiting for a disaster to happen and booting up when that happens is... priceless. And the cherry on the cake would be the option of route customer Public IP traffic (Only for costumers with their own Autonomous System, of course).

- I would like to suggest to the EC2 Team the idea of not auto-terminating EC2 Instances living into and Auto Scaling Group until their "paying hour" has been spent. When in an Auto Scaling Group, the EC2 instances are automatically launched and terminated. That's the way it should be. But if the application load decreases, could happen that an instance that was brought to life 30 minutes ago will be terminated (no longer needed) and you will waste the other remaining 30 minutes. Would be nice to have an option to tell AS not to terminate an instance until the whole hour has passed.

- And learn, meet interesting people and have fun :)


My tentative agenda:

Tuesday 10/28/2012
APN Partner Summit 

Wednesday 11/28/2012 

10:30 AM-11:20 AM Room 3205: RMG205 Decoding Your AWS Bill 
10:30 AM-11:20 AM Room 3004: STP204 Pinterest Pins AWS! Running Lean on AWS Once You've Made It 

01:00 PM-01:50 PM Room Venetian A: RMG204 Optimizing Costs with AWS 
01:00 PM-01:50 PM Room 3404: ENT205 Drinking our own Champagne: Amazon.com's Adoption of AWS 

02:05 PM-02:55 PM Room Venetian B: STG301 Using Amazon Elastic Block Store 
02:05 PM-02:55 PM Room 3205: CPN203 Saving with EC2 Spot Instances 

03:25 PM-04:15 PM Room 3004: BDT301 High Performance Computing in the Cloud 
03:25 PM-04:15 PM Room 3202: SPR208 Hitting Your Cloud's Usage Sweet Spot (Presented by Newvem) 

04:30 PM-05:20 PM Room 3404: STP101 What Can You Do With $100? 
04:30 PM-05:20 PM Room Venetian C: ARC203 Highly Available Architecture at Netflix 

Thursday 11/29/2012 

10:30 AM-11:20 AM Room Venetian C: ARC204 AWS Infrastructure Automation 
10:30 AM-11:20 AM Room Venetian D: STG205 Amazon S3: Reduce costs, save time, and better protect your data 

11:35 AM-12:25 PM Room Venetian A: ARC202 Architecting for High Availability & Multi-Availability Zones on AWS 
11:35 AM-12:25 PM Room Venetian B: CPN208 Failures at Scale and How to Ignore Them 

03:00 PM-03:50 PM Room 3305: CPN202 Run More for Less 
03:00 PM-03:50 PM Room 3101B: CPN206 Learning From the Masters 

04:05 PM-04:55 PM Room 3404: BDT204 Awesome Applications of Open Data 
04:05 PM-04:55 PM Room Venetian D: STG302 Archive in the Cloud with Amazon Glacier 

05:10 PM-06:00 PM Room Venetian B: CPN209 Your Linux Amazon Machine Image 
05:10 PM-06:00 PM Room 3205: CPN211 My Data Center Has Walls that Move 


To anyone around Las Vegas those days:


juan...@gmail.com

Thursday, November 15, 2012

Newvem First Contact and EC2 Reserved Instances

newvem logo

Thanks to a friend I had the opportunity to test the Newvem Beta tool connected to his AWS Customer account and I'd like to share some conclusions.
With the fast growing of the Cloud market, some tools are emerging to help us to managing those "invisible" and fast-growing architectures. Some of them are trying to help us answering the question: "How can I pay less each month?". I have to say in advance that there is no magic answer. What is good for me could not be good for you. But there are some common scenarios where a bit of help could be useful.

Security:

First thing that caught my eye was the security recommendations. I wasn't expecting this here but I have to admit that they're convenient. With a constantly growing infrastructure and a group of Admins taking care of it, there is no such a thing as unnecessary security recommendations.

newvem-aws-blog-domenech-security-recomendations

Tell me about the money:

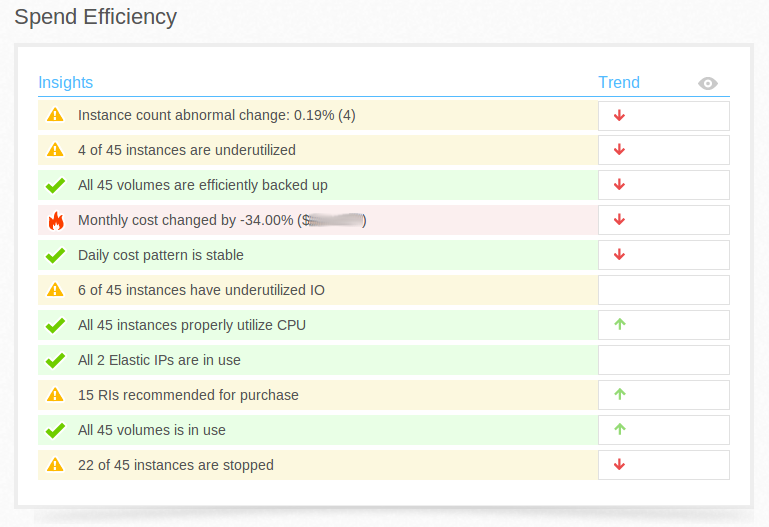
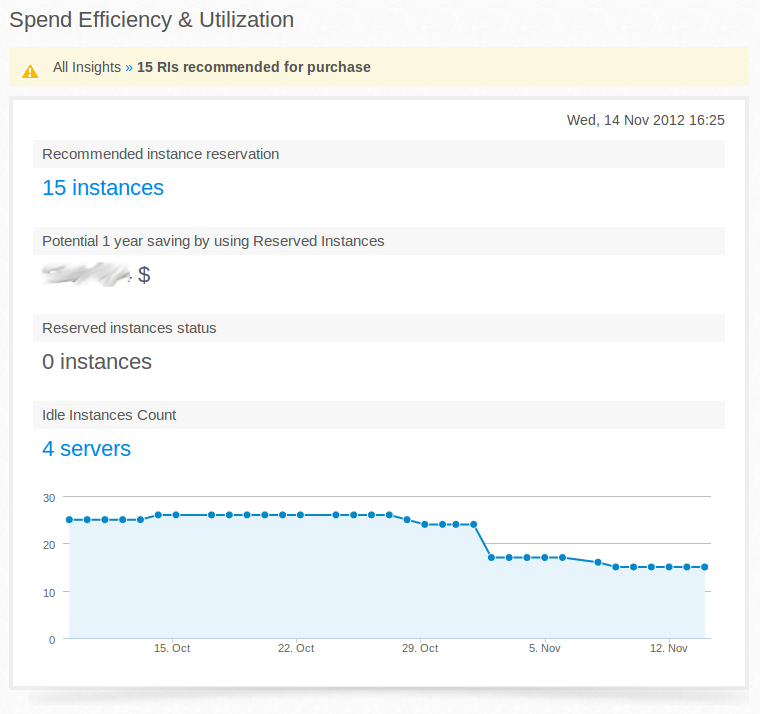
With the Spend Efficiency chart Newvem tell us some topics to pay attention. The tool has no way to know what is normal for us from what is not. For example, in that evaluation, a bunch of instances were manually stopped after a special event and this was detected as an abnormal situation and an alert was generated (Monthly cost changed by -34.00%). So those warnings should be considered just suggestions coming from someone who can't read your mind. The "better safe than sorry" approach.

newvem-aws-blog-domenech-spend-efficiency


Reserved Instances Recommendation:

newvem-aws-blog-domenech-reserved-instances-3


newvem-aws-blog-domenech-reserved-instances-list

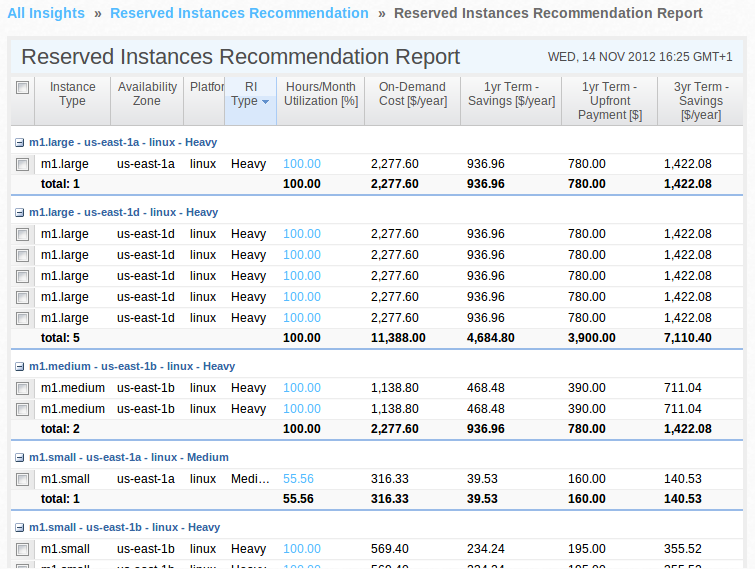
Well, this is not rocket science. An Instance that has been up 100% of the time during the last 2 months should be a Reserved Instance. And among Light, Medium and Heavy Reserved Instance should be Heavy. That's the recommendation.
This RI Calculator gives us also some numbers showing how much money we have to pay in advance (Upfront) if we decide to purchase RI for all those Instace-types in a 1-Year and 3-Year scenarios.
What I really appreciate here is that simple table is a good starting point to begin to understand the concept behind EC2 Reserved Instances. This a confusing topic for beginners no matter in which company area they are. Thanks to this table, 3 key concepts are explained using our current AWS infrastructure: RI Instance-Type, RI Availability Zone and RI Hourly Price.

RI Instance-Type:
A Reserved Instance purchase applies to a EC2 Instance-Type. No instance hostname, nor Instance ID present or future. A RI gives you a better price for an Instance-Type wherever its usage or which of your EC2 Instance will end up using it.

RI Availability Zone:
A Reserved Instance applies to an Availability Zone. If you run two different Instances in two different AZs within a Region you will have to purchase two RIs. One for each AZ.

RI Hourly Price:
The year savings shown on the table above are the multiplication of the better price/hour you'll get when buying a RI and the amount of hours in a year. What it is telling us is the potential benefit we would get if our machine is 100% of the time up and running. Benefit of the RI model compared to On-Demand. But this doesn't mean that we have (or we will) to keep our instance always up. We will do what we will need. Starting and stopping it, but with a better Hourly Price.

And again, when it comes to recommendation there are not flawless and we need the human in the process. For example here:

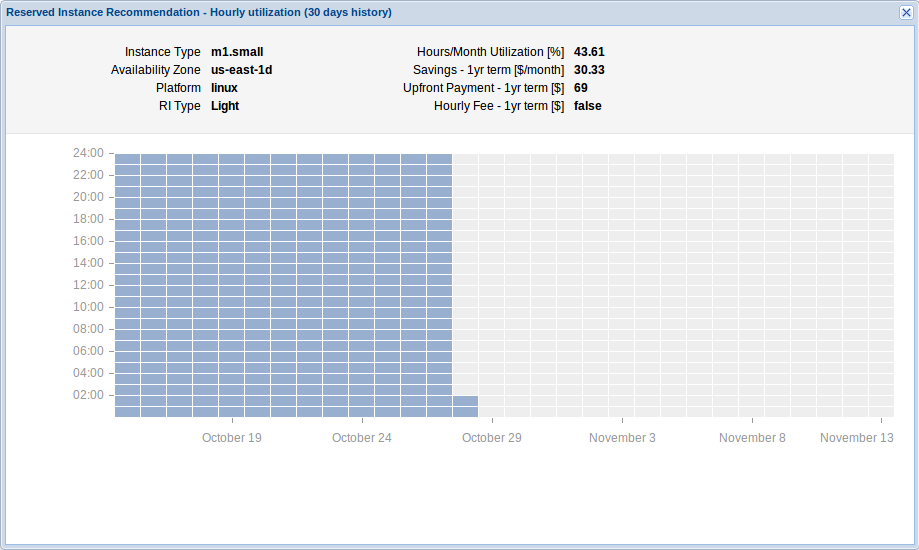
newvem-aws-blog-domenech-reserved-instances-recommendation-light

For this m1.small us-east-1d we have a RI Light recommendation but the historic chart shows me that this Instance Type is not longer used in that particular AZ and it probably won't be at the future. Obviously, this is something I know and the RI Calculator don't. The human touch.


S3

Newvem also give us information about our Simple Storage Service but with my current scenario there are few things to say. This website stores in S3 its static content and with "only" 12 GBytes total space used, no recommendations needed.

newvem-aws-blog-domenech-s3-buckets


In conclusion,

I think that this kind of tool is useful now but it will much more in the near future. There is no limit for what the software could learn and predict and all those third-party products will advance faster than the cloud provider (AWS in this case) when it comes to "high level" management. I'm not saying that we will never see a button on our Cloud Console with the name "How to pay less" on it. Just saying that some else will be always faster to put that at work.

There are areas not covered where help is needed to handle important cost sources, like Internet and CloudFront traffic. This is a burden for heavy traffic sites and currently AWS don't give you a report to understand where your spending in traffic is going. You need third party software to collect and process logs so here... room from improvement.

The application covered here is in Beta stage and free. Looking forward to knowing its final price... This will be the key to conclude if is useful for my customers or not.

Last minute note! I've just noticed their today's General Availability announcement. Seems that this product is no longer beta. Good luck boys!


Monday, November 12, 2012

Automatically Manage your AWS EC2 Instance Public IP Addresses with Route53

aws-route-53-rest-api-dns-ec2-call


Our Goal: Easy access to our Instances by Name instead to locate them through EC2 Console after an IP change caused by a stop/start action.

Is quite tedious the need to open the AWS Console to find an instance Public IP after a stop/start action or if we forgot which previously it was. Here I show you a tool that consists in a script executed inside the instance that updates its DNS records in Route53 using the instance Tag "Name". This is and optional Tag we can use to store the "Host Name" when launching a new instance or edit it anytime we need afterwards. If this optional tag is not present, the script I show you here, will use the instance ID to update (or create) the corresponding DNS A Record. This way we will have always the instance accessible through its FQDN and it will be stable (It won't change overtime).
Example: My-Instance-Host-Name.ec2.My-Domain.com

$ ssh -i juankeys.pem ec2-user@webserver1.ec2.donatecpu.com

Last login: Mon Nov 12 00:14:35 2012 from 77.224.98.33
       __|  __|_  )
       _|  (     /   Amazon Linux AMI
      ___|\___|___|
https://aws.amazon.com/amazon-linux-ami/2012.09-release-notes/ 
There are 4 total update(s) available
Run "sudo yum update" to apply all updates.

[ec2-user@webserver1 ~]$ 


Instance Tag Name
Configure your EC2 instance with a Tag Name using the Console. Usually the Instance Launch Wizard will ask you for it but if is empty, you can update it any time you want. In this example the Tag Name will be "webserver1".

aws-route-53-ec2-tag-name-donatecpu-com


Preparations
Log into your instance and make sure that the EC2 API is ready to run. Follow this previous post if you need help with that. You will need a IAM user with admin permissions on Route53.


Route53
Create a new zone in Route53 (if you don't have any created yet) and save the assigned Hosted Zone ID:

aws-route-53-ec2-tag-name-donatecpu-com


dnscurl.pl
dnscurl.pl is an AWS Perl tool that will help you to use the Route53 API. Unlike other AWS APIs, Route53's API uses REST methods. This means that is accessible using HTTP calls (similar to accessing instance metadata) which looks good but the authentication process is a painfuldnscurl.pl simplifies the authentication process to generate the calls (GET and POST) to the Route 53 API.

Create a directory called /root/bin/ to store our tools, download dnscurl.pl, and make it executable:

# cd /root

# mkdir bin

# cd bin

# wget -q http://awsmedia.s3.amazonaws.com/catalog/attachments/dnscurl.pl

# chmod u+x dnscurl.pl

Note: You can also download the dnscurl.pl from here using a browser.

Create in the same folder a file called ".aws-secrets" (note the dot at the begining of the file name) with the following content and make it only readable for root:

%awsSecretAccessKeys = (
    '(your key name without parentheses)' => {
        id => '(your access key without parentheses)',
        key => '(your secret key without parentheses)', 
    },
);

# chmod go-rwx .aws-secrets 

Test dnscurl.pl with a simple read-only call. If everything is good, you should see something like this:

# ./dnscurl.pl --keyfile ./.aws-secrets --keyname juan -- -v -H "Content-Type: text/xml; charset=UTF-8" https://route53.amazonaws.com/2012-02-29/hostedzone/Z1F5BRDVBM
                                                                           0.0%
* About to connect() to route53.amazonaws.com port 443 (#0)
*   Trying 72.21.194.53...
* connected
* Connected to route53.amazonaws.com (72.21.194.53) port 443 (#0)
* Initializing NSS with certpath: sql:/etc/pki/nssdb
*   CAfile: /etc/pki/tls/certs/ca-bundle.crt
  CApath: none
* SSL connection using SSL_RSA_WITH_RC4_128_MD5
* Server certificate:
* subject: CN=route53.amazonaws.com,O=Amazon.com Inc.,L=Seattle,ST=Washington,C=US
* start date: Nov 05 00:00:00 2010 GMT
* expire date: Nov 04 23:59:59 2013 GMT
* common name: route53.amazonaws.com
* issuer: CN=VeriSign Class 3 Secure Server CA - G3,OU=Terms of use at https://www.verisign.com/rpa (c)10,OU=VeriSign Trust Network,O="VeriSign, Inc.",C=US
> GET /2012-02-29/hostedzone/Z1F5BRDVBM HTTP/1.1
> User-Agent: curl/7.24.0 (x86_64-redhat-linux-gnu) libcurl/7.24.0 NSS/3.13.5.0 zlib/1.2.5 libidn/1.18 libssh2/1.2.2
> Host: route53.amazonaws.com
> Accept: */*
> Content-Type: text/xml; charset=UTF-8
> Date: Sun, 11 Nov 2012 23:21:26 GMT
> X-Amzn-Authorization: AWS3-HTTPS AWSAccessKeyId=AKIAJ5,Algorithm=HmacSHA1,Signature=/i+0d=

< HTTP/1.1 200 OK
< x-amzn-RequestId: 843632ca-2c56-11e2-94bf-3b3ef9a8f457
< Content-Type: text/xml
< Content-Length: 582
< Date: Sun, 11 Nov 2012 23:21:26 GMT

<?xml version="1.0"?>
* Connection #0 to host route53.amazonaws.com left intact
<GetHostedZoneResponse xmlns="https://route53.amazonaws.com/doc/2012-02-29/"><HostedZone><Id>/hostedzone/Z1F5BRDVBM</Id><Name>donatecpu.com.</Name><CallerReference>454848C9-18D1-2DDB-AC24-B629E</CallerReference><Config/><ResourceRecordSetCount>2</ResourceRecordSetCount></HostedZone><DelegationSet><NameServers><NameServer>ns-1146.awsdns-15.org</NameServer><NameServer>ns-1988.awsdns-56.co.uk</NameServer><NameServer>ns-228.awsdns-28.com</NameServer><NameServer>ns-783.awsdns-33.net</NameServer></NameServers></DelegationSet></GetHostedZoneResponse>* Closing connection #0

You should see a correctly created AWSAccessKeyId and Signature, no error messages and at the bottom and XML output showing the DNS Servers for you Zone.


start-up-names.sh
Download my script start-up-names.sh and make it executable:
# wget -q http://www.domenech.org/files/start-up-names.sh 

# chmod u+x start-up-names.sh

Or copy and paste the following text into a file called start-up-names.sh

#!/bin/bash
# start-up-names.sh
# http://blog.domenech.org

logger start-up-name.sh Started

#More environment variables than we need but... we always do that
export AWS_CREDENTIAL_FILE=/opt/aws/apitools/mon/credential-file-path.template
export AWS_CLOUDWATCH_HOME=/opt/aws/apitools/mon
export AWS_IAM_HOME=/opt/aws/apitools/iam
export AWS_PATH=/opt/aws
export AWS_AUTO_SCALING_HOME=/opt/aws/apitools/as
export AWS_ELB_HOME=/opt/aws/apitools/elb
export AWS_RDS_HOME=/opt/aws/apitools/rds
export EC2_AMITOOL_HOME=/opt/aws/amitools/ec2
export EC2_HOME=/opt/aws/apitools/ec2
export JAVA_HOME=/usr/lib/jvm/jre
export PATH=/usr/local/sbin:/usr/local/bin:/sbin:/bin:/usr/sbin:/usr/bin:/opt/aws/bin:/root/bin

# *** Configure these values with your settings ***
#API Credentials
AWSSECRETS="/root/bin/.aws-secrets"
KEYNAME="juan"
#Hosted Zone ID obtained from Route53 Console once the zone is created
HOSTEDZONEID="Z1F5BRDVBM"
#Domain name configured in Route53 and used to store our server names
DOMAIN="ec2.donatecpu.com"
# *** Configuration ends here ***

#Let's get the Credentials that EC2 API needs from .aws-secrets dnscurl.pl file
ACCESSKEY=`cat $AWSSECRETS | grep id | cut -d\' -f2`
SECRETKEY=`cat $AWSSECRETS | grep key | cut -d\' -f2`
#InstanceID Obtained from MetaData 
INSTANCEID=`wget -q -O - http://169.254.169.254/latest/meta-data/instance-id`

#Public Instance IP obtained from MetaData
PUBLICIP=`wget -q -O - http://169.254.169.254/latest/meta-data/public-ipv4`

#IP Currently configured in the DNS server (if exists)
CURRENTDNSIP=`dig $INSTANCEID"."$DOMAIN A | grep -v ^\; | sort | tail -1 | awk '{print $5}'`

#Instance Name obtained from the Instance Custom Tag NAME
WGET="`wget -q -O - http://169.254.169.254/latest/meta-data/instance-id`"
INSTANCENAME=`ec2-describe-instances -O $ACCESSKEY -W $SECRETKEY $WGET --show-empty-fields | grep TAG | grep Name | awk '{ print $5 }'`

echo $INSTANCEID $PUBLICIP $CURRENTDNSIP $INSTANCENAME
logger $INSTANCEID $PUBLICIP $CURRENTDNSIP $INSTANCENAME

#Set the new Hostname using the Instance Tag OR the Instance ID
if [ -n "$INSTANCENAME" ]; then
hostname $INSTANCENAME
logger Hostname from InstanceName set to $INSTANCENAME
else
hostname $INSTANCEID
logger Hostname from InstanceID set to $INSTANCEID
fi

#dnscurl.pl Delete Current InstanceID Public IP A Record to allow Later Update
COMMAND="<?xml version=\"1.0\" encoding=\"UTF-8\"?><ChangeResourceRecordSetsRequest xmlns=\"https://route53.amazonaws.com/doc/2012-02-29/\"><ChangeBatch><Changes><Change><Action>"DELETE"</Action><ResourceRecordSet><Name>"$INSTANCEID"."$DOMAIN".</Name><Type>A</Type><TTL>600</TTL><ResourceRecords><ResourceRecord><Value>"$CURRENTDNSIP"</Value></ResourceRecord></ResourceRecords></ResourceRecordSet></Change></Changes></ChangeBatch></ChangeResourceRecordSetsRequest>"

/root/bin/dnscurl.pl --keyfile $AWSSECRETS --keyname $KEYNAME -- -v -H "Content-Type: text/xml; charset=UTF-8" -X POST https://route53.amazonaws.com/2012-02-29/hostedzone/$HOSTEDZONEID/rrset -d "$COMMAND"

#dnscurl.pl Create InstanceID Public IP A Record
COMMAND="<?xml version=\"1.0\" encoding=\"UTF-8\"?><ChangeResourceRecordSetsRequest xmlns=\"https://route53.amazonaws.com/doc/2012-02-29/\"><ChangeBatch><Changes><Change><Action>"CREATE"</Action><ResourceRecordSet><Name>"$INSTANCEID"."$DOMAIN".</Name><Type>A</Type><TTL>600</TTL><ResourceRecords><ResourceRecord><Value>"$PUBLICIP"</Value></ResourceRecord></ResourceRecords></ResourceRecordSet></Change></Changes></ChangeBatch></ChangeResourceRecordSetsRequest>"

/root/bin/dnscurl.pl --keyfile $AWSSECRETS --keyname $KEYNAME -- -v -H "Content-Type: text/xml; charset=UTF-8" -X POST https://route53.amazonaws.com/2012-02-29/hostedzone/$HOSTEDZONEID/rrset -d "$COMMAND"

logger Entry $INSTANCEID.$DOMAIN sent to Route53

#Create DNS A record for Instance Name (if exists)
if [ -n "$INSTANCENAME" ]; then

#dnscurl.pl Delete Current Instance Name Public IP A Record to allow Later Update
COMMAND="<?xml version=\"1.0\" encoding=\"UTF-8\"?><ChangeResourceRecordSetsRequest xmlns=\"https://route53.amazonaws.com/doc/2012-02-29/\"><ChangeBatch><Changes><Change><Action>"DELETE"</Action><ResourceRecordSet><Name>"$INSTANCENAME"."$DOMAIN".</Name><Type>A</Type><TTL>600</TTL><ResourceRecords><ResourceRecord><Value>"$CURRENTDNSIP"</Value></ResourceRecord></ResourceRecords></ResourceRecordSet></Change></Changes></ChangeBatch></ChangeResourceRecordSetsRequest>"

/root/bin/dnscurl.pl --keyfile $AWSSECRETS --keyname $KEYNAME -- -v -H "Content-Type: text/xml; charset=UTF-8" -X POST https://route53.amazonaws.com/2012-02-29/hostedzone/$HOSTEDZONEID/rrset -d "$COMMAND"

#dnscurl.pl Create Instance Name Public IP A Record
COMMAND="<?xml version=\"1.0\" encoding=\"UTF-8\"?><ChangeResourceRecordSetsRequest xmlns=\"https://route53.amazonaws.com/doc/2012-02-29/\"><ChangeBatch><Changes><Change><Action>"CREATE"</Action><ResourceRecordSet><Name>"$INSTANCENAME"."$DOMAIN".</Name><Type>A</Type><TTL>600</TTL><ResourceRecords><ResourceRecord><Value>"$PUBLICIP"</Value></ResourceRecord></ResourceRecords></ResourceRecordSet></Change></Changes></ChangeBatch></ChangeResourceRecordSetsRequest>"

/root/bin/dnscurl.pl --keyfile $AWSSECRETS --keyname $KEYNAME -- -v -H "Content-Type: text/xml; charset=UTF-8" -X POST https://route53.amazonaws.com/2012-02-29/hostedzone/$HOSTEDZONEID/rrset -d "$COMMAND"

logger Entry $INSTANCENAME.$DOMAIN sent to Route53
fi

logger start-up-names.sh Ended

Edit the script and adapt the variables from the "*** Configure these values with your settings ***" section with your parameters.

Test it:

# ./start-up-names.sh

(text output)

# tail /var/log/messages

Nov 11 23:30:57 ip-10-29-30-48 ec2-user: start-up-name.sh StartedNov 11 23:30:59 ip-10-29-30-48 ec2-user: i-87eef4e1 54.242.191.68 ns-1146.awsdns-15.org. webserver1
Nov 11 23:30:59 ip-10-29-30-48 ec2-user: Hostname from InstanceName set to webserver1
Nov 11 23:31:00 ip-10-29-30-48 ec2-user: Entry i-87eef4e1.ec2.donatecpu.com sent to Route53
Nov 11 23:31:00 ip-10-29-30-48 ec2-user: Entry webserver1.ec2.donatecpu.com sent to Route53
Nov 11 23:31:00 ip-10-29-30-48 ec2-user: start-up-names.sh Ended

Reading /var/log/messages you should have something like this output. First the script gathers the Instance ID and the Public IP reading the Instance Metadata. Then the current IP ($CURRENTDNSIP) configured at the DNS (if any) using dig and the Instance Tag Name using the ec2-describe-instances command. The first change to happen is the Host Name. If the Instance Tag Name is present it will become the machine Host Name and if not, the Instance ID will play this role. One way or the other we will have a stable way to identify our servers. The Instance ID is unique and won't change over time. Then we call the Route53 API using dnscurl.pl four times. There is no API call to "overwrite" and existing DNS record so we need to Delete it first and Create it afterwards. The Delete call has to include the exact values the current entry has (quite silly if you ask me...) so that is why the scripts needs the current Public IP configured. We Delete using the old values and Create using the new ones. One dnscurl execution for the Instance ID (that always exists) and again for the Instance Tag Name (if present).

Two entries should have been automatically created in your Hosted Zoned and present at Route53 console for our Instance:

aws-route-53-dns-record-set

Those entries are ready to use and now you can forget its Instance ID or volatile Public IP and just ping or ssh to the name. Example: webserver1.ec2.donatecpu.com.


Auto Start
The main purpose is to maintain our servers IPs automatically updated in our DNS so we need that the main script is executed every time the machine starts. Once we've verified that it works fine is time to edit /etc/rc.local and add start-up-names.sh full path to it:

#!/bin/sh
#
# This script will be executed *after* all the other init scripts.
# You can put your own initialization stuff in here if you don't
# want to do the full Sys V style init stuff.

touch /var/lock/subsys/local

/root/bin/start-up-names.sh

And that is it. I suggest you to manually stop and start your instance and verify that its new assigned Public IP is updated in the DNS. All AMIs you generate from this Instance will include this described  configuration and therefore they will dynamically maintain their IPs. Cool!

Note: When playing with changes in DNS Records their TTL value matters. In this exercise we've used a value of 600 seconds so a change could take up to 10 minutes to be available in your local area network if your DNS server has cached it.

Wednesday, November 7, 2012

AWS EC2 Auto Scaling: External CloudWatch Metric

aws-ec2-auto-scaling-external-cloudwatch-metric-diagram


Our Goal: Create an Auto Scaling EC2 Group in a single Availability Zone and use a Custom CloudWatch metric to scale up (and down) our Web Server cluster behind an ELB.

This exercise will include the Basic Auto Scaling scenario discussed early but now we will add a real Auto Scaling capability using a metric generated inside our application (like Apache Busy Workers). You have a post here about creating custom metrics in CloudWatch. You can easily adapt that configuration to any other custom metric.

What we need for this exercise:

This exercise assumes you have previous experience with EC2 Instances, Security Groups, Custom AMIs and EC2 Load Balancers.

We need:

- An empty ELB.
- A custom AMI.
- A EC2 Keys Pair to use to access our instances.
- A EC2 Security Group.
- Auto Scaling API (If you need help configuring the access to the Auto Scaling API check this post).
- A Apache HTTP server with mod_status module.
- A Script to collect the mod_status value and store it into CloudWatch.
- A custom Test Web Page called "/ping.html".

Preparation:

Is important to be sure that all the ingredients are working as expected. Auto Scaling could be difficult to debug and nasty situations may occur like: A group of instances starting while you are away or a new instance starting and stoping every 20 seconds with bad billing consequences (AWS will charge you a full hour for any started instance, despite it has been only one minute running).
I strongly suggest to manually test your components before create a Auto Scaling configuration.

- Create your Key Pair (In my example "juankeys").

- Deploy an ELB (In my example is named "elb-prueba") in your default AZ ("a"). Configure the ELB to use your custom /ping.html page as Instance Health Monitor. You should see something like this:


- Create a Security Group for your Web Server instances (In my example "wed-servers"). Add to this Security Group the ELB Security Group for Port 80. It should look like the capture below. In this example this SG allows to Ping and TCP access from my home to the Instances AND allows access to port 80 to the connections originated in my Load Balancers (amazon-elb-sg). The Web Server port 80 is not open to Internet, is only open to the ELB.


- Deploy a EC2 Instance using the previous created Key Pair and Security Group. Install a Apache HTTP server and be sure it is configured to start automatically. Create a Test Page called /ping.html at the web sever root folder. This text page can print out ant text you like. Its only mission is to be present. A HTTP 200 is OK and anything else is KO.

- In this exercise we will add to our custom Linux AMI a script and a crontab configuration to create a Custom CloudWatch Metric. We will use what we've learned in this previous post.
Once you have the Apache HTTP server installed and mod_status configured following that previous post instructions, copy this new script version:

#!/bin/bash

logger "Apache Status Started"

export AWS_CREDENTIAL_FILE=/opt/aws/apitools/mon/credential-file-path.template
export AWS_CLOUDWATCH_HOME=/opt/aws/apitools/mon
export AWS_IAM_HOME=/opt/aws/apitools/iam
export AWS_PATH=/opt/aws
export AWS_AUTO_SCALING_HOME=/opt/aws/apitools/as
export AWS_ELB_HOME=/opt/aws/apitools/elb
export AWS_RDS_HOME=/opt/aws/apitools/rds
export EC2_AMITOOL_HOME=/opt/aws/amitools/ec2
export EC2_HOME=/opt/aws/apitools/ec2
export JAVA_HOME=/usr/lib/jvm/jre
export PATH=/usr/local/sbin:/usr/local/bin:/sbin:/bin:/usr/sbin:/usr/bin:/opt/aws/bin:/root/bin

SERVER=`wget -q -O - http://169.254.169.254/latest/meta-data/instance-id`
ASGROUPNAME="grupo-prueba"
BUSYWORKERS=`wget -q -O - http://localhost/server-status?auto | grep BusyWorkers | awk '{ print $2 }'`

/opt/aws/bin/mon-put-data --metric-name httpd-busyworkers --namespace "AS:$ASGROUPNAME" --unit Count --value $BUSYWORKERS

logger "Apache Status Ended with $SERVER $BUSYWORKERS"


It is similar to the one used before but now we collect just one metric (instead of two) and we store it under a common CloudWatch Name Space. All instances involved in this Auto Scaling exercise will store its Busy Workers values under the same Name Space and Metric Name. In my example the Name Space will be "AS:grupoprueba" and the Metric Name "httpd-busyworkers".

- Create a crontab configuration to execute this script every 5 minutes.

- Create your Custom AMI from the previous created temporal instance. Terminate the previous created temporal instance when finished.

- Deploy a new instance using the recently created AMI (In my example "ami-0e5ee467") to test the Apache server and the script. Check if the HTTP Server starts automatically.

- Manually add the recently created instance under the ELB. Verify that the Load Balancer Check works and it gives you the Status "In Service" for this instance. Verify that the /ping.html page can be accessed from Internet using a browser and the ELB public DNS name ("http://(you-ELB-DNS-name)/ping.html").

- Verify that the script executes every 5 minutes (following the previous instructions) and that CloudWatch is storing the new metric. You could either check that using CloudWatch console or using command line:

# mon-get-stats --metric-name httpd-busyworkers --namespace "AS:grupo-prueba" --statistics Average

2012-11-05 15:15:00  5.0    Count
2012-11-05 15:25:00  5.0    Count
2012-11-05 15:35:00  2.0    Count
2012-11-05 15:40:00  5.0    Count
2012-11-05 15:45:00  5.0    Count

- Once everything is checked, remove the instance from the ELB and Terminate the instance.

Definition:

# as-create-launch-config config-prueba --image-id ami-0e5ee467 --instance-type t1.micro --monitoring-disabled --group web-servers --key juankeys

OK-Created launch config

as-create-auto-scaling-group grupo-prueba --launch-configuration config-prueba --availability-zones us-east-1a --min-size 0 --max-size 4 --load-balancers elb-prueba --health-check-type ELB --grace-period 120

OK-Created AutoScalingGroup

With as-create-launch-config we define the Instance configuration we will be using in our Auto Scaling Group: Launch config name, AMI ID, Intance Type, Advanced Monitoring (1 minute monitoring) disabled, Security Group and Key Pair to use.

With as-create-auto-scaling-group we define the group itself: Group Name, Launch Confing to use, AZs to deploy in, the minimum number of running instances that our application needs to run,  the maximum number of instances we desire to scale up to, ELB name, the Health Check type set to ELB (by default is the EC2 System Status) and the grace period of time grant to a instance before is checked after launch (in seconds).

as-put-scaling-policy scale-up-prueba --auto-scaling-group grupo-prueba --adjustment=1 --type ChangeInCapacity --cooldown 300

arn:aws:autoscaling:us-east-1:085366056805:scalingPolicy:36101053-f0f3-4c7c-bc4c-60a8a2a943a1:autoScalingGroupName/grupo-prueba:policyName/scale-up-prueba

With as-put-scaling-policy we create a Policy called "scale-up-prueba" for the previous created AS Group. When triggered it will increase the AS in one unit (one instance). No other AS activities for this Group are allowed until 300 seconds passes. After this successful API call a ARN identifier is returned. Save it because we will need it for the Alarm definition.

mon-put-metric-alarm scale-up-alarm --comparison-operator GreaterThanThreshold --evaluation-periods 1 --metric-name httpd-busyworkers --namespace "AS:grupo-prueba" --period 600 --statistic Average --threshold 10 --alarm-actions arn:aws:autoscaling:us-east-1:085366056805:scalingPolicy:36101053-f0f3-4c7c-bc4c-60a8a2a943a1:autoScalingGroupName/grupo-prueba:policyName/scale-up-prueba

OK-Created Alarm

With mon-put-metric-alarm we create a new CloudWatch alarm called "scale-up-alarm" that will be triggered when the last 10 minutes average of all the values of "httpd-busymetrics" is bigger than 10. Then the scale up policy will be executed through the ARN identifier. In this example, each Apache server with no external load has an average of 5 busyworkers so a good way to test it is to define a threshold of 10 to increase our cluster capacity. In a real world configuration those values will be very different and you have to tune them to mach your application.

as-put-scaling-policy scale-down-prueba --auto-scaling-group grupo-prueba --adjustment=-1 --type ChangeInCapacity --cooldown 300

arn:aws:autoscaling:us-east-1:085366056805:scalingPolicy:0763114c-f1d3-4f35-a9c5-56c2a7466073:autoScalingGroupName/grupo-prueba:policyName/scale-down-prueba

Now we've created the Policy to be executed when capacity of the AS Group needs to be reduced. And a new ARN identifier is received.

mon-put-metric-alarm scale-down-alarm --comparison-operator LessThanThreshold --evaluation-periods 1 --metric-name httpd-busyworkers --namespace  "AS:grupo-prueba" --period 600 --statistic Average --threshold 9 --alarm-actions arn:aws:autoscaling:us-east-1:085366056805:scalingPolicy:0763114c-f1d3-4f35-a9c5-56c2a7466073:autoScalingGroupName/grupo-prueba:policyName/scale-down-prueba

OK-Created Alarm

The same way we did before with the scale up alarm, we create a new one to trigger the down scale process. The configuration is the same but now the threshold is 9 Apache busy workers after 10 o more minutes.

Note: By default all the API calls are sent to the us-east-1 Region (N.Virginia).

Describe:

# as-describe-launch-configs --headers

LAUNCH-CONFIG  NAME           IMAGE-ID      TYPE    
LAUNCH-CONFIG  config-prueba  ami-0e5ee467  t1.micro   

as-describe-auto-scaling-groups --headers

AUTO-SCALING-GROUP  GROUP-NAME    LAUNCH-CONFIG  AVAILABILITY-ZONES  LOAD-BALANCERS  MIN-SIZE  MAX-SIZE  DESIRED-CAPACITY  TERMINATION-POLICIES
AUTO-SCALING-GROUP  grupo-prueba  config-prueba  us-east-1a          elb-prueba      0         4         0                 Default   

We use "as-describe-" commands to read the result of our last configuration. Special attention to as-describe-auto-scaling-instances:

# as-describe-auto-scaling-instances --headers   

No instances found

This command give us quick look to the running instances within our AS Groups. This is very useful when dealing with AS to find out the amount of instances running and its state. Now the result is "No instances found" and this is correct. Our current configuration says that zero is the minimum healthy instances our application needs to work.

We can describe the recently created alarms with mon-describe-alarms:

# mon-describe-alarms --headers

ALARM             STATE  ALARM_ACTIONS                             NAMESPACE        METRIC_NAME        PERIOD  STATISTIC  EVAL_PERIODS  COMPARISON            THRESHOLD
scale-down-alarm  ALARM  arn:aws:autoscalin...6056805:AutoScaling  AS:grupo-prueba  httpd-busyworkers  600     Average    1             LessThanThreshold     9.0
scale-up-alarm    OK     arn:aws:sns:us-eas...ame/scale-up-prueba  AS:grupo-prueba  httpd-busyworkers  600     Average    1             GreaterThanThreshold  10.0

Or using the CloudWatch Console:


Under normal circumstances, the "scale-down-alarm" will have the state "Alarm" and this is normal.
Using CloudWatch Console you can add to this alarms and action to send an Email notification to obtain better visibility during the test.

Bring it to Production:

Now the cluster is idle, no instances running. So now we will tell to AS that our application requires a minimum of 1 healthy instance to run:

# as-update-auto-scaling-group grupo-prueba --min-size 1

OK-Updated AutoScalingGroup

#  as-describe-auto-scaling-groups --headers

AUTO-SCALING-GROUP  GROUP-NAME    LAUNCH-CONFIG  AVAILABILITY-ZONES  LOAD-BALANCERS  MIN-SIZE  MAX-SIZE  DESIRED-CAPACITY  TERMINATION-POLICIES
AUTO-SCALING-GROUP  grupo-prueba  config-prueba  us-east-1a          elb-prueba      1         4         1                 Default         
INSTANCE  INSTANCE-ID  AVAILABILITY-ZONE  STATE    STATUS   LAUNCH-CONFIG
INSTANCE  i-9d022be1   us-east-1a         Pending  Healthy  config-prueba

Notice that now Minimum is 1 in the AS configuration and now there is a new instance under our AS Group ("i-9d022be1" in this example). This instance has been automatically deployed by AS to match the desired number of healthy instances for our application. Notice the "Pending" status that means that it is still in the initialization process. We can follow this process with as-describe-auto-scaling-instances:

as-describe-auto-scaling-instances 
INSTANCE  i-9d022be1  grupo-prueba  us-east-1a  Pending  HEALTHY  config-prueba
# as-describe-auto-scaling-instances 
INSTANCE  i-9d022be1  grupo-prueba  us-east-1a  Pending  HEALTHY  config-prueba
# as-describe-auto-scaling-instances 
INSTANCE  i-9d022be1  grupo-prueba  us-east-1a  Pending  HEALTHY  config-prueba
# as-describe-auto-scaling-instances 
INSTANCE  i-9d022be1  grupo-prueba  us-east-1a  InService  HEALTHY  config-prueba
# as-describe-auto-scaling-instances 
INSTANCE  i-9d022be1  grupo-prueba  us-east-1a  InService  HEALTHY  config-prueba

Now the recently launched instance is in service. That means that its Health Check (ELB ping.html test page) verifies OK. If you open the AWS Console and read the current ELB "Instances Tab", the new instance ID should be there, automatically added to the Load Balancer and your application up and running.

Common problem scenarios:
- If you observe that the new instances are constantly Launched and Terminated by AS this probably means that /ping.html page fails. Stop the experiment with "as-update-auto-scaling-group grupo-prueba --min-size 0" and verify your components.
- If your web server and test page verify OK but the AS is still Deploying and Terminating the instances without a chance to rise to the Healthy status then you should increase the value of "--grace-period" in the AS Group definition to give more time to your AMI to start a initialize its services.
- If the instances start but they fail to automatically be added to the ELB then probably the Instances are deployed in a incorrect Availability Zone. Either correct your AS Launch Configuration or expand the ELB to the rest of AZs in your Region.

Force to Scale UP:

To test the AS Policy we can lie to CloudWatch and tell it that we have much more load than we really have. We will inject a false amount of Busy Workers to the CW Metric:

mon-put-data --metric-name httpd-busyworkers --namespace "AS:grupo-prueba" --unit Count --value 20

mon-put-data --metric-name httpd-busyworkers --namespace "AS:grupo-prueba" --unit Count --value 20

mon-put-data --metric-name httpd-busyworkers --namespace "AS:grupo-prueba" --unit Count --value 20


# mon-get-stats --metric-name httpd-busyworkers --namespace "AS:grupo-prueba" --statistics Average
2012-11-05 15:35:00  2.0   Count
2012-11-05 15:40:00  5.0   Count
2012-11-05 15:45:00  5.0   Count
2012-11-05 15:50:00  5.0   Count
2012-11-05 15:55:00  5.0   Count
2012-11-05 16:00:00  2.0   Count
2012-11-05 16:15:00  5.0   Count
2012-11-05 16:20:00  5.0   Count
2012-11-05 16:21:00  20.0  Count
2012-11-05 16:23:00  20.0  Count

And after a while, the average Busy Workers value rises and this triggers the scale up Alarm and then its AS Policy:

as-describe-scaling-activities --headers --show-long view

ACTIVITY,135c95fa-8d67-4664-85e4-5d78dfb73353,2012-11-05T16:25:13Z,grupo-prueba,Successful,(nil),"At 2012-11-05T16:24:14Z a monitor alarm scale-up-alarm in state ALARM triggered policy scale-up-prueba changing the desired capacity from 1 to 2.  At 2012-11-05T16:24:27Z an instance was started in response to a difference between desired and actual capacity, increasing the capacity from 1 to 2.",100,Launching a new EC2 instance: i-ebeac397,(nil),2012-11-05T16:24:27.687Z

And a second instance automatically is launched:

# as-describe-auto-scaling-instances

INSTANCE  i-9d022be1  grupo-prueba  us-east-1a  InService  HEALTHY  config-prueba
INSTANCE  i-ebeac397  grupo-prueba  us-east-1a  InService  HEALTHY  config-prueba

If we keep feeding CloudWatch with fake values and we keep the average high, soon a third instance will be launched:

as-describe-scaling-activities --headers --show-long view

ACTIVITY,ACTIVITY-ID,END-TIME,GROUP-NAME,CODE,MESSAGE,CAUSE,PROGRESS,DESCRIPTION,UPDATE-TIME,START-TIME
ACTIVITY,ef187965-9a79-463f-8a2d-b6f413cc9226,2012-11-05T16:31:11Z,grupo-prueba,Successful,(nil),"At 2012-11-05T16:30:14Z a monitor alarm scale-up-alarm in state ALARM triggered policy scale-up-prueba changing the desired capacity from 2 to 3.  At 2012-11-05T16:30:30Z an instance was started in response to a difference between desired and actual capacity, increasing the capacity from 2 to 3.",100,Launching a new EC2 instance: i-99e4cde5,(nil),2012-11-05T16:30:30.795Z

# as-describe-auto-scaling-instances

INSTANCE  i-99e4cde5  grupo-prueba  us-east-1a  InService  HEALTHY  config-prueba
INSTANCE  i-9d022be1  grupo-prueba  us-east-1a  InService  HEALTHY  config-prueba
INSTANCE  i-ebeac397  grupo-prueba  us-east-1a  InService  HEALTHY  config-prueba

If we leave it alone for a while, the average will decrease and the automatically launched instances will be terminated with a 10 minutes interval:

# as-describe-auto-scaling-instances 

INSTANCE  i-99e4cde5  grupo-prueba  us-east-1a  InService    HEALTHY  config-prueba
INSTANCE  i-9d022be1  grupo-prueba  us-east-1a  Terminating  HEALTHY  config-prueba
INSTANCE  i-ebeac397  grupo-prueba  us-east-1a  InService    HEALTHY  config-prueba

# as-describe-scaling-activities --headers --show-long view

ACTIVITY,ACTIVITY-ID,END-TIME,GROUP-NAME,CODE,MESSAGE,CAUSE,PROGRESS,DESCRIPTION,UPDATE-TIME,START-TIME
ACTIVITY,7095a10e-d7b7-4e68-a1c9-cb350e8b0d45,2012-11-05T16:45:03Z,grupo-prueba,Successful,(nil),"At 2012-11-05T16:43:48Z a monitor alarm scale-down-alarm in state ALARM triggered policy scale-down-prueba changing the desired capacity from 3 to 2.  At 2012-11-05T16:44:04Z an instance was taken out of service in response to a difference between desired and actual capacity, shrinking the capacity from 3 to 2.  At 2012-11-05T16:44:04Z instance i-9d022be1 was selected for termination.",100,Terminating EC2 instance: i-9d022be1,(nil),2012-11-05T16:44:04.106Z

# as-describe-auto-scaling-instances 

INSTANCE  i-99e4cde5  grupo-prueba  us-east-1a  InService  HEALTHY  config-prueba
INSTANCE  i-ebeac397  grupo-prueba  us-east-1a  InService  HEALTHY  config-prueba

# as-describe-scaling-activities --headers --show-long view

ACTIVITY,ACTIVITY-ID,END-TIME,GROUP-NAME,CODE,MESSAGE,CAUSE,PROGRESS,DESCRIPTION,UPDATE-TIME,START-TIME
ACTIVITY,31e8673e-7255-410e-b8a7-51ee677f2bb8,(nil),grupo-prueba,InProgress,(nil),"At 2012-11-05T16:50:23Z a monitor alarm scale-down-alarm in state ALARM triggered policy scale-down-prueba changing the desired capacity from 2 to 1.  At 2012-11-05T16:50:35Z an instance was taken out of service in response to a difference between desired and actual capacity, shrinking the capacity from 2 to 1.  At 2012-11-05T16:50:35Z instance i-ebeac397 was selected for termination.",50,Terminating EC2 instance: i-ebeac397,(nil),2012-11-05T16:50:35.538Z

# as-describe-auto-scaling-instances 

INSTANCE  i-99e4cde5  grupo-prueba  us-east-1a  InService  HEALTHY  config-prueba


We have learned something here: An instance in an AS environment is volatile. It could disappear at any time because it is Terminated and with the instance its EBS volumes. You have to take that into account when designing your infrastructure. If your web server needs to store some information that you could need later you should save it elsewhere: Cloudwatch, external log server, data base, etc.

Also notice that the survived instance is the i-99e4cde5. This is the last one that was deployed. And the first one to be terminated during the shrinking process was the first member of the group. Auto Scaling uses that logic to help you to get more value for your money. EC2 bills you the full hour, so leaving alive the last launched instance gives you a chance to use what you've already payed for.

Average of what?

The Policy used in this example is not a perfect method and this Average Metric is a bit confusing. First we have to know that the Average CPU used in the official documentation for Auto Scaling is a native CloudWatch metric. It is automatically created when you define your AS Group. EC2 takes the CPU usage of all Instances in your AS Group and store there the Average value (It does the same with other EC2 metrics: CW Console -> All Metrics pull-down menu -> "EC2: Aggregated by Auto Scaling Group"). An elegant method could be do the same kind of aggregation but with our custom metric, but I don't know how to do that. So, what we have is a single metric name receiving all those different values from our cluster members. Then is important that all those members send that information in a timely fashion to not distort the average calculation. I think that a "crontab */5 * * * *" is a good solution but I'm quite open to other suggestions.

The ELB role:

By default the Load Balancer will send an equal amount of connection to the web cluster members and therefore the amount of Apache Busy Workers will remain "balanced" among the cluster. The configuration described here is not useful when using "sticky sessions". If a web server increases its connections above the other cluster members, could trigger an unnecessary scale-up action.

Cleaning:

You don't want an AS Group doing things while you sleep so I suggest you to delete all your AS configurations after your test is done.

# as-update-auto-scaling-group grupo-prueba --min-size 0

OK-Updated AutoScalingGroup

# as-update-auto-scaling-group grupo-prueba --desired-capacity 0

OK-Updated AutoScalingGroup

# as-delete-auto-scaling-group grupo-prueba

    Are you sure you want to delete this AutoScalingGroup? [Ny]y
OK-Deleted AutoScalingGroup

# as-delete-launch-config config-prueba

    Are you sure you want to delete this launch configuration? [Ny]y  

OK-Deleted launch configuration

# as-describe-auto-scaling-instances 

No instances found